
Glimmer lantern, glimmer!
Glimmer lantern glimmer, little stars a-shimmer.
Over meadow, moor and dale flitter flutter elfin veil.
Pee-wit pee-wit, tick-a-tack-a-tick, coo-coo-roo-coo.
Glimmer lantern glimmer, little stars a-shimmer.
Over rock and stock and stone wander tripping little gnome.
Pee-wit, pee-wit, tick-a-tack-a-tick, coo-coo-roo-coo.
This is one of the traditional songs sung during a Waldorf lantern walk. There is a wonderful free resource from the Cincinnati Waldorf School Community Singers that is full of songs sung during lantern walks. You can find the songs by clicking HERE.
I’m going to let you in on a little secret. We have never participated in a public lantern walk, and we’ve never specifically celebrated Martinmas. I would tell a story each year with the same impulse (it was in grade two that I introduced Martin, before then it was stories with acts of kindness), and then we spent much of November collecting clothing and food for local charities to help those less fortunate stay warm and fed through the winter. Each year, after the Halloween decorations had been put away, children (and adults) would try on all last years winter clothes and set aside those items they had outgrown to be passed onto our local charities. And actually, this was the first year (2023) that we did our post Halloween winter clothes try on and everyone still fit into their clothing from the previous year! My children have officially reached the age where their blessed feet have stopped growing (gasp!). The wallet appreciates the pause but the heart weeps slightly at the new phase, ha ha.
Why have we never participated in a traditional Martinmas celebration? Well, firstly, it is not a tradition either my husband or myself had growing up, there were no local walks taking place that we were aware of, and I didn’t feel confident enough to lead my own. Also, it is SO close to the busy month of October (Thanksgiving in Canada falls in October, as have a few friend and family birthdays and of course Halloween) that what was needed was to keep the rhythm of the home. It felt more appropriate to fall into the impulse of kindness and giving than to feel rushed to prepare for another event.
BUT, that doesn’t mean we didn’t make lanterns! Preparing light to carry us through the slowly descending darkness is a central theme this time of year. Our version of a lantern walk was using lanterns on our evening walk with the dog and the children loved it!
I share this little festival anecdote with you so that when the day comes, if another festival seems like a lot to prepare for, but the impulse of the festival calls to you, please do what is needed for your family and create something new. It is the repetition through the year that matters, not the specific actions and material props.
Now, I’m never one to say no to lantern making, whatever the festival! I absolutely love the glow of a paper lantern, and what better way to bring the new to painted watercolour paper. Here is a very simple paper lantern that can literally be made in minutes.
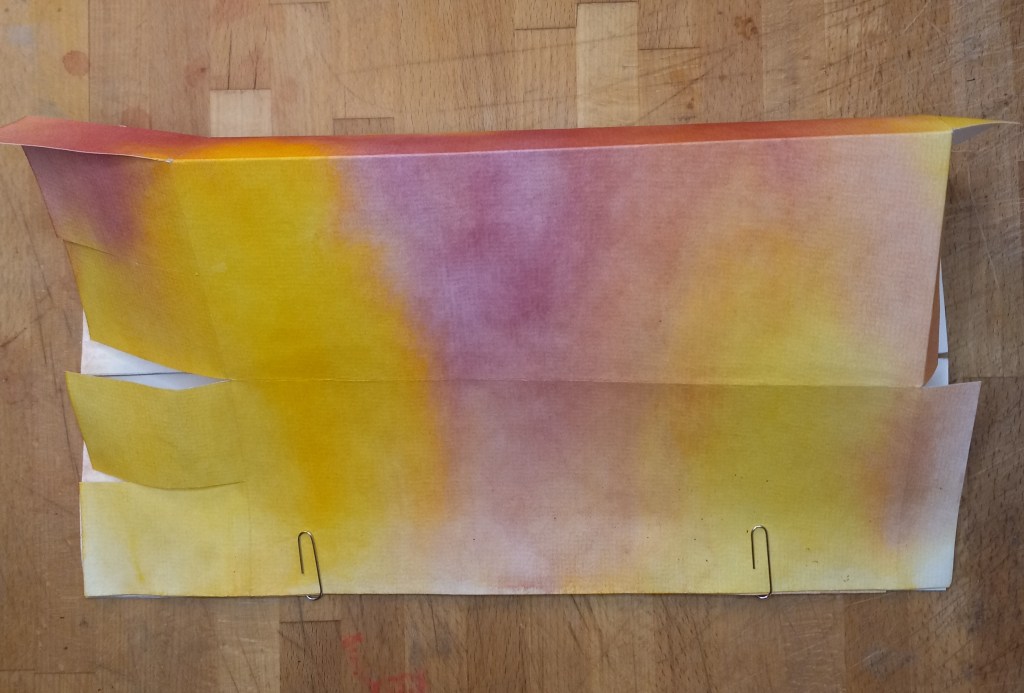
You will need one sheet of painted water colour paper, scissors, glue stick or craft glue and paper clips. I used watercolour paper that was 50 x 35 cm.
STEP ONE
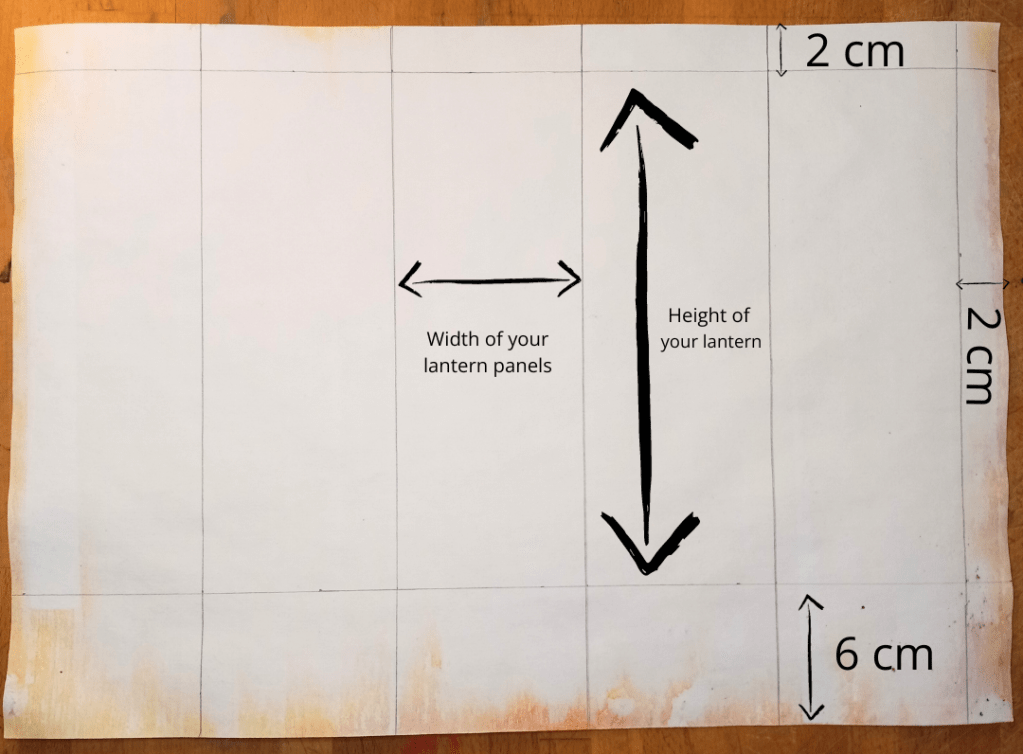
Using a ruler, on the back side of the watercolour paper, mark off 2cm along the top and right side. Mark off 6cm along the bottom. The middle section will determine the width and height of your lantern. Divide the width of the paper, minus the 2cm, by 5 to create equal panels. My lantern is tall and narrow. If you would like a lantern that is a bit shorter, cut the page down to size and re-draw your 2cm line across the top.
STEP TWO
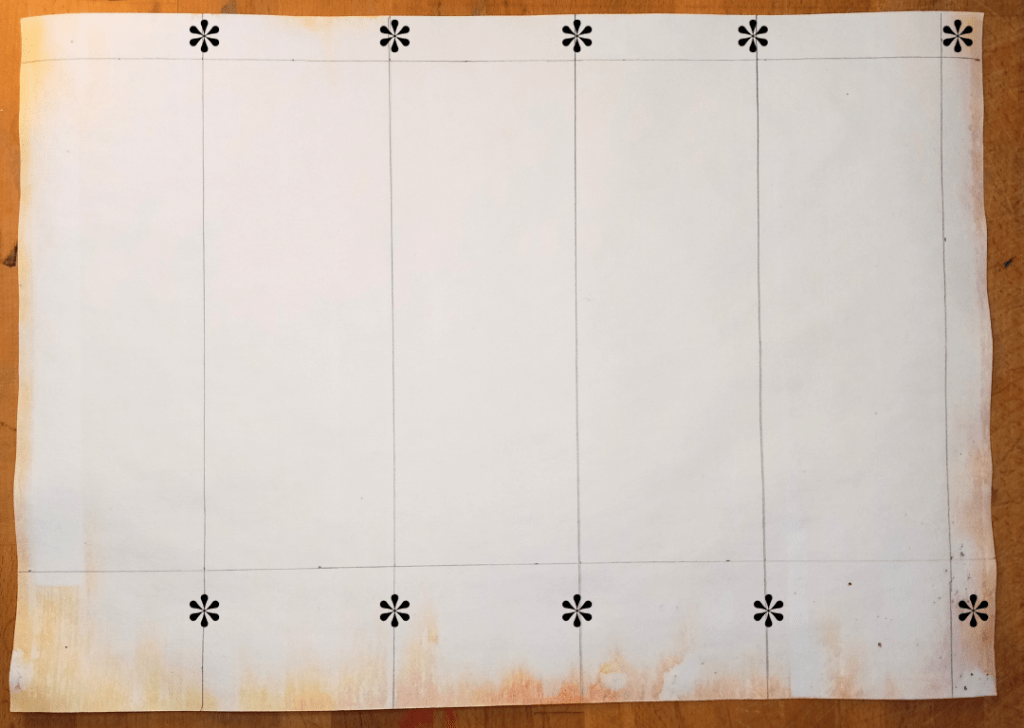
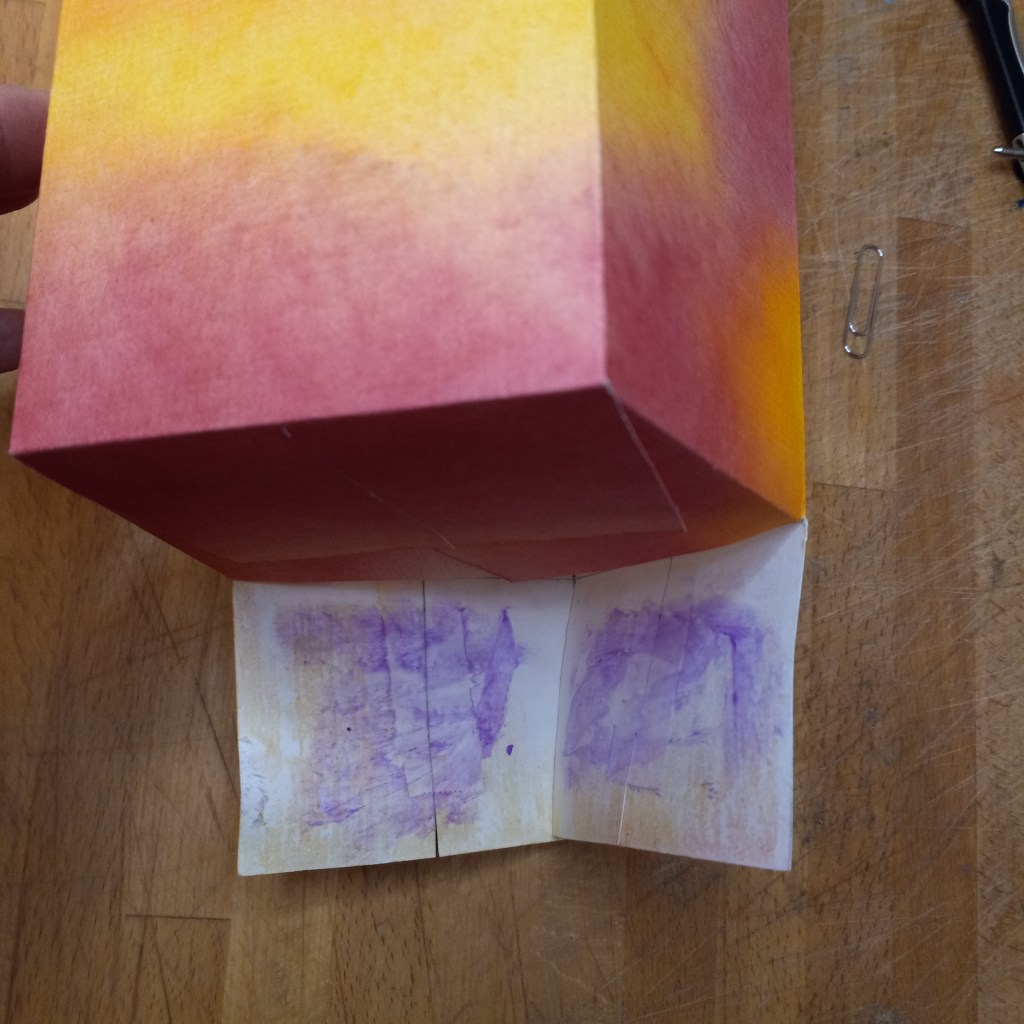
Cut along the vertical lines where each star sits, ONLY TO THE HORIZONTAL LINE, with the exception of the right side where you will cut away the corners (cut along both the horizontal and vertical lines) to create a tab needed to glue the lantern together.
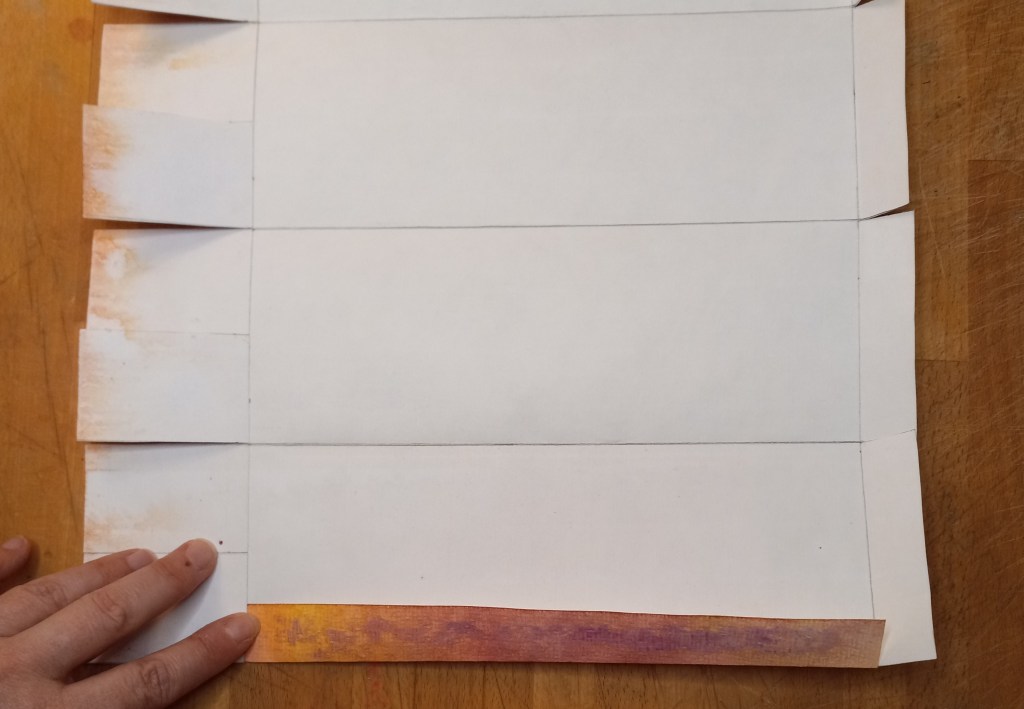
STEP 3

Fold along the pencil lines (Please ignore the extra set of lines along the bottom in this image, I was trying a new bottom gluing method that I decided not to use in the end!)
STEP 4
Put a good layer of glue along the right side.
STEP 5
Bring the left side across to line up with the tab, press firmly and hold together with paperclips for a while OR just sit there holding it if you’ve got nothing else to do!
STEP 6
Spread a good layer of glue on each of the bottom tabs, stack them and press them all down to stick. Make sure before you press them down you have held the shape of the pentagon.
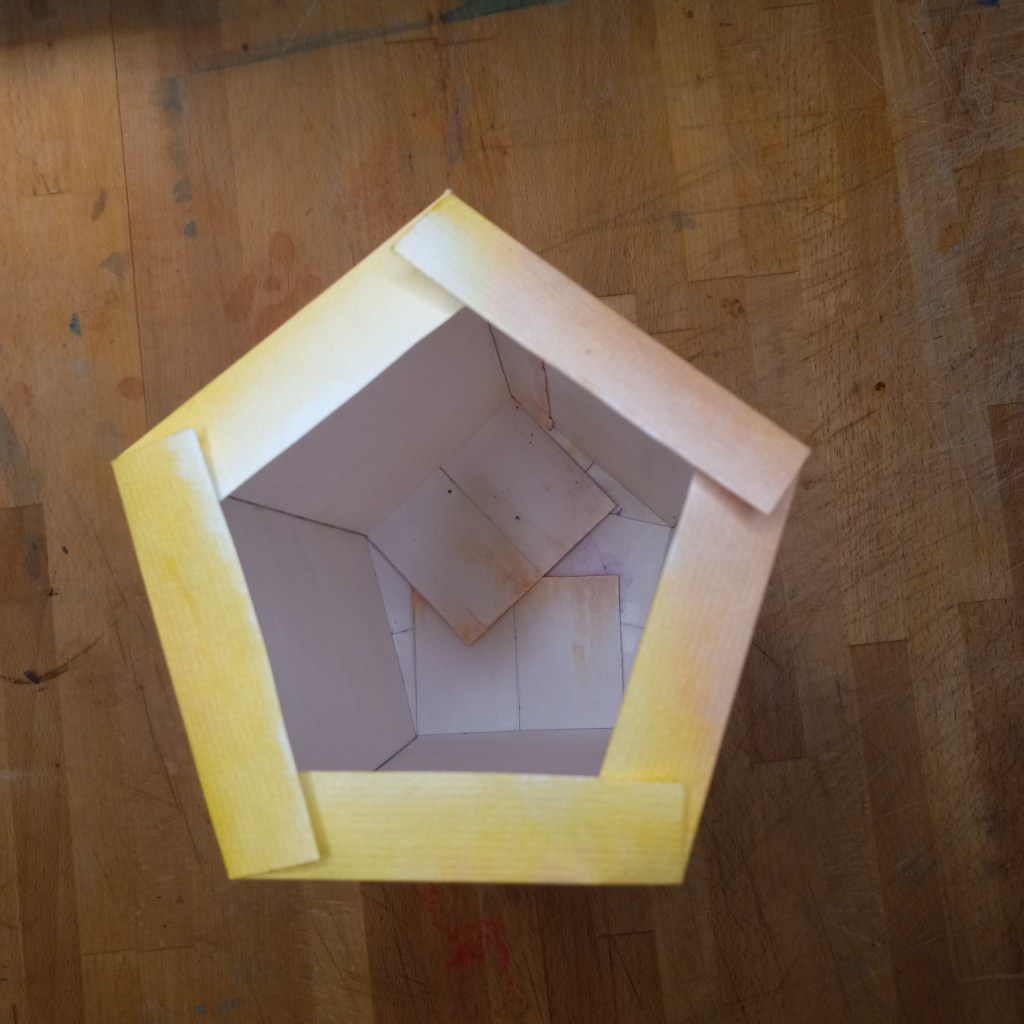
Here is an image from the top. Once the bottom flaps have glued together, you can either turn the top edge in and glue to the sides (I like to do this if I intend to add a string or wire for carrying), or glue each corner to the other to create a beautiful frame around the top. Punch holds and thread string and wire, if using.

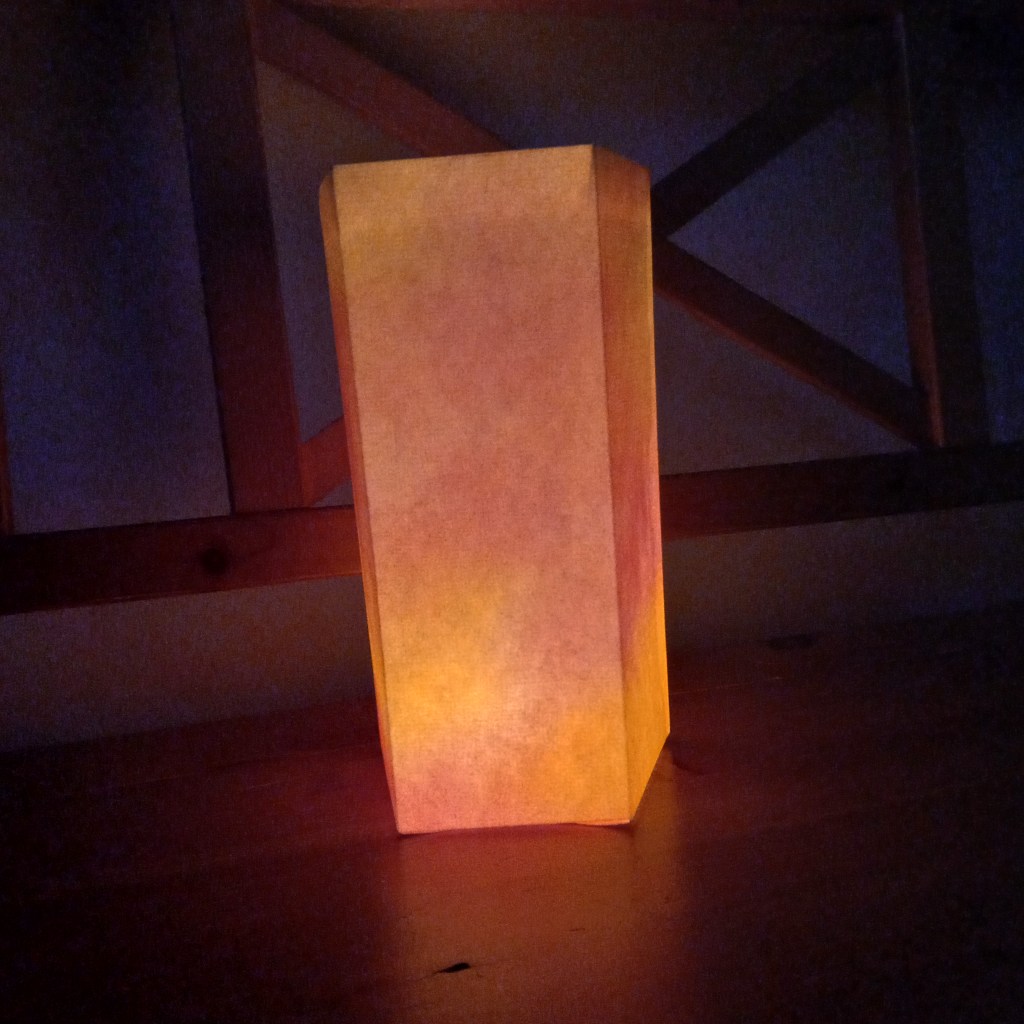
And your lantern is complete! Always be careful with candles in paper lanterns. We like to place our tealights in a small clear glass to prevent it from ever getting close to the sides. You can find very thin glass cylinders in the flower and candle aisles of your local crafts store.
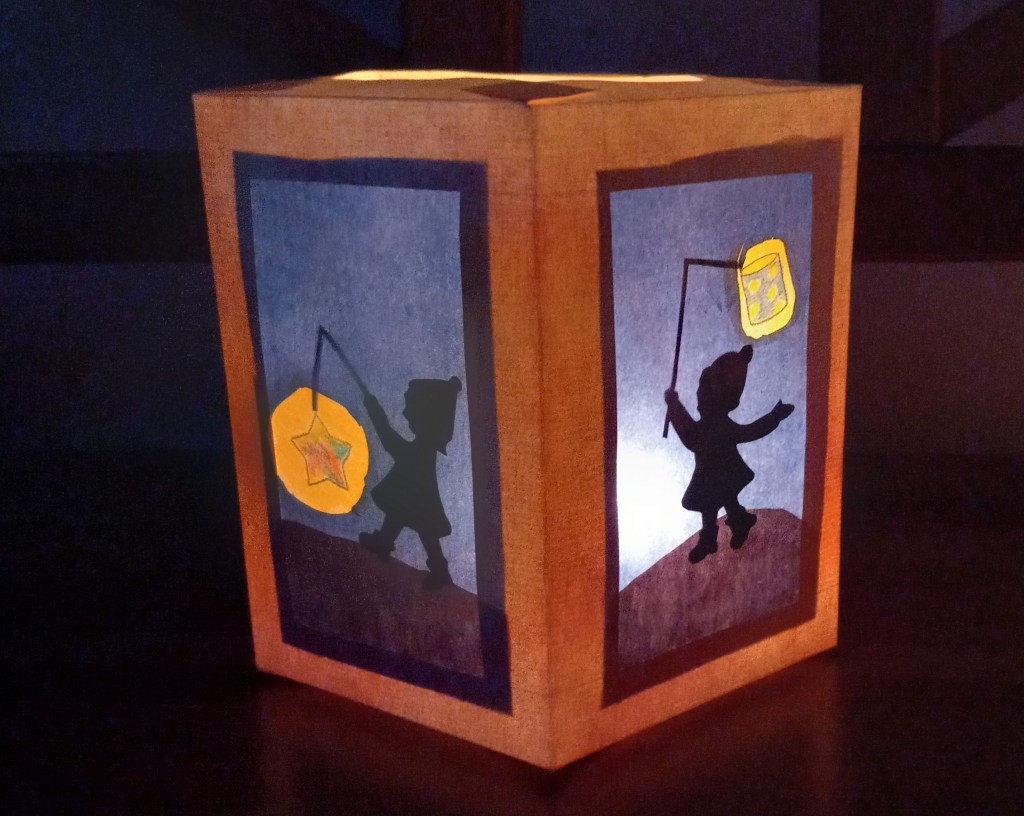
If you are feeling adventurous, you can cut windows or shapes into each panel after you’ve drawn your lines and before your fold. Here, I’ve used blue and brown kite paper with a lantern walkers silhouette decoration. Once the windows are complete, continue folding and gluing normally. The template for the silhouettes is from the 2022 Autumn Seasonal Collection created by Light of the Stone on ETSY, also known as My Seasonal Treasury on Instagram. You can find her shop HERE
However you choose to celebrate, or not, the festival of St Martin, I hope this simple lantern will help you carry light into these darkening days.
Until next time,
Marina
Discover more from Growing Together in Freedom
Subscribe to get the latest posts sent to your email.
